Here it is my very first tutorial. I have been asked how I make these but hadn't made two alike but I think I have mastered it enough to have workable directions!
First we will do the innards! I decorated my wipes pockets. Take your wipe pocket and fold in half so it becomes 4.5" x11" The fold will be towards the middle of your clutch. I put binding on the edges to add a little something. If you would like to add the words you can use this
product or follow the direction at the bottom. For the wipes pocket fold in half so you end up with a 6.5" x 5.5" pocket. Again I decorated it the same as the wipes pocket.
NOTE: This pocket will hold two diapers (Size four gets real tight, so you may want to make your pocket 8" x11" folded in half to be 8"x5.5")
Take your lining piece and sew the top and bottom to the lining (I use about a 1/4" seam allowance in all directions!). You will end up with a whole like the picture shows.
On each end you will do a dart. Fold pocket flat towards the middle 1/2" then fold a little back towards the edge and fold again towards the middle. It will kind of look like an "s". Then pin it and do the same on the other side.When it is pinned on both sided the pocket should lay flat.
Sew the opening shut (note this should be three raw edges being sewn together), take out your pins and it should look like this:
A side view:
For the diaper pocket, lay your pocket piece right side towards the lining. It should be about 2 1/2 from the wipes pocket. Sew with a 1/4" seam allowance. Then flip the pocket over the seam so the wrong side is now facing the lining and "top-stitch" the pocket down.
On the left of the picture below you can see what the left side looks like. For the right side fold your edge under 1/4" and pin to the lining. This should be sewn at 4" if using the pocket size I put in the example or 5" if you went with the bigger size diaper pocket.
Pin the fold at 4 1/4" (or 5 1/4" if you did the bigger pocket) from the left edge of the pocket. You will end up with a hole like the other pocket.
Pin a dart as you did with the wipe pocket and it should look like this.
Sew the bottom. And you now have your completed lining.
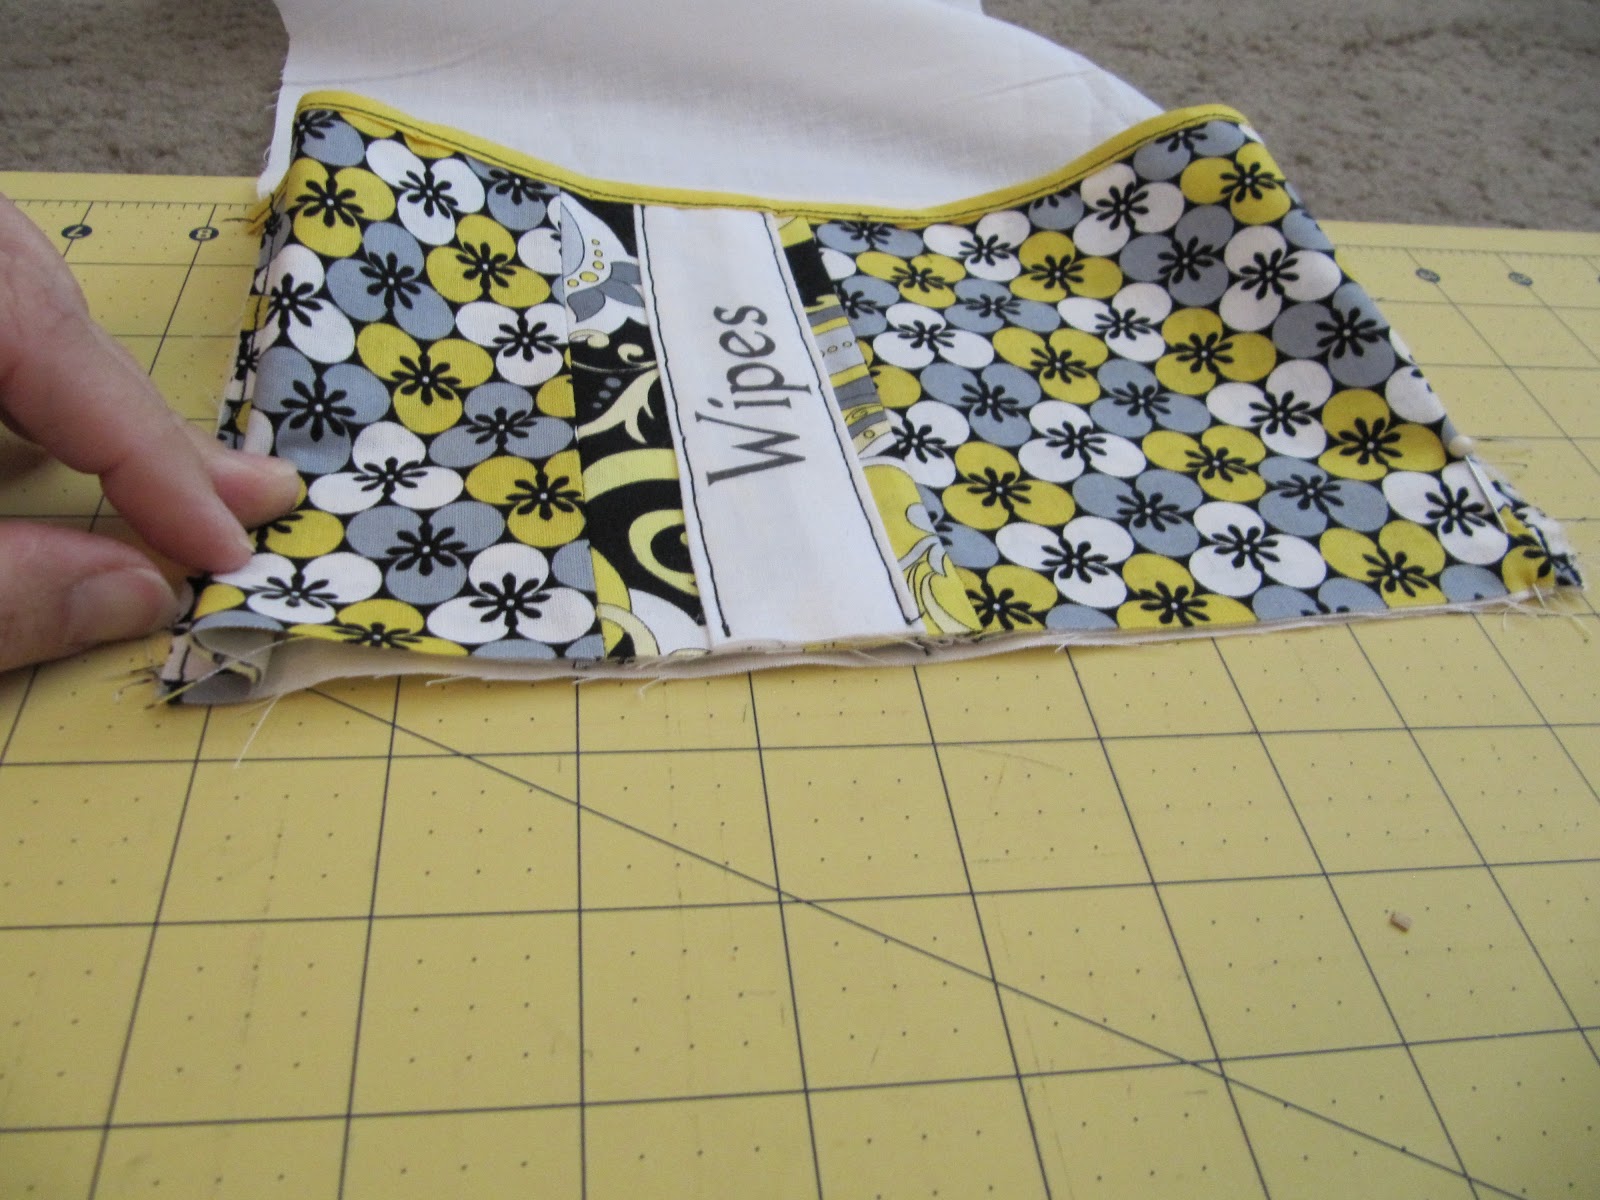
On the wipes picket I pinned the fabric towards the middle so I wouldn't sew the excess fabric in the side seam. In this picture on the left is the top of the wipe pocket and where my thumb is on the side (11" side) of the pocket. The fabric is pinned at a diagonal. You can kind of see that in the lower right of the picture.
Now is the assembly of the clutch!
Lay your batting down top with your outside piece with the right side up (away from the batting). Then put your lining on top with the right side (pockets) facing down. The wipe pocket edge will line up with the lining and outer material edge. The lining will be 3/4" shorter than the outer edge. You will want to center the lining. It will be about 3/8" on each side. Sew the lining and outer piece together.
 |
| You are looking at the backside (wrong side) of the lining and the right side of the outer material is peaking out the top and bottom. You can not see the batting. On the left I have it all pinned together. |
For the bottom you will fold the edge to line up the edges of the material. Where my finger is you can see that the corner of the lining and out material is about a 1/4" further than the side you had just sewn, but the loose edge now lines up with the lining. Then pin the edge to ling up with the lining and sew until 1/2" for the right edge. Repeat on the other side.
When you are done you will end up with a big pocket. with the batting and outer material bulging ove the lining.
Turn the fabric so the right sides are facing out, press the edges and sew again in the seam (aka stitch in the ditch). It will now have about a 1/4" edging of the outer fabric on the inside.
For your last edge, take the corner and fold down (on both sides). Then fold the entire side down 1/4". Then fold again. The first fold puts the raw edge towards the pockets. The second fold hides the raw edge. Pin it then sew as close to the edge as possible.
For your velcro, you can place it in the middle of that edge. As seen below, I put the soft side on the lining (see below) and the stiff side on the out side if the wipes pocket (you can't see it in the picture below). I would recommend placing a wipe container and some diapers in your clutch before putting on your velcro to see where it should fit the best. I had stitched the velcro on. For decorative purposes only I hand sewed on a button on the out side where the soft velcro piece is.
Following this tutorial
here by Handmade by Jill, I made a matching Diaper wipes case. I did find that I needed to make the material about an inch wider than what the pattern said. Maybe I didn't read the directions and that is what it says : )
Here is a photo of the finished project.
Diaper and Wipes labels (sorry no pictures)
You will need fabric, freezer paper, and inkjet printer and some tape.
On your word processor (or program of choice) type up what you what to print. Cut your fabric to the appropriate size. Cut a piece of freezer paper the same size. Iron the freezer paper and fabric with the wax side towards the fabric. This acts as a stabilizer when going through your printer.
Print your picture/word on a plain piece of paper. Then tape your fabric facing up on the paper, placing it exactly where your want it to print. Make sure you tape down the edge that will feed first into the printer and a little piece on the opposite edge will help. If you are working with a thicker fabric, you can cut both the freezer paper and material to 8 1/2" by 11" and feed that directly into your printer. Place in your paper tray according to your printer directions. My HP pulls from the tray with the side it prints on facing down, so that is how I would place it in my printer.
PLEASE NOTE: This has worked for me, but it has also jammed in my printer when the edges were loose. If you buy the expensive product, it will probably feed better. I would recommend staying close while printing so you can stop it before it gets too jammed. Just in case, but do this at your own risk.


